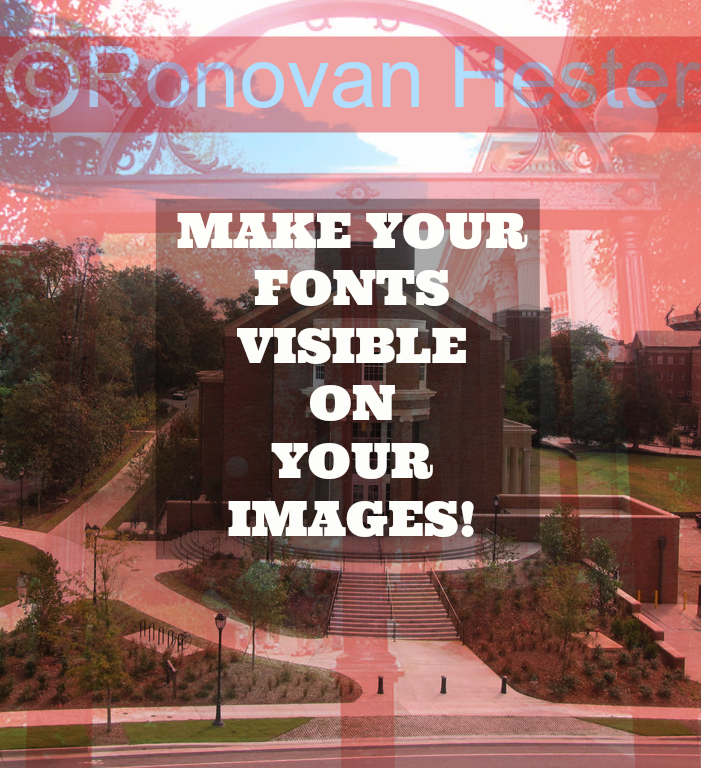
You have a great piece of writing and a great photo to put it on. You put the words on the image and what happens? You can’t seem to find that happy color of font to show all of your words because a normal photo has a great number of colors in it. Even if your photo is the sky, you have shades of blue ranging from so pale a blue it looks white down to the dark blues to almost dusk. The answer? Overlay images.
A Note: All overlay images were found in the public domain. The actual photo of the building is mine.
One thing to know, this post is not that long, it’s mostly taken up with image examples.
How do you make it work and still see your image? You know you could put a block of color in the sky and put your text in. But that ruins what you’re going for.
Enter picmonkey.com.
I use picmonkey quite often in tandom with pixlr.com, a free photoshop like product online.
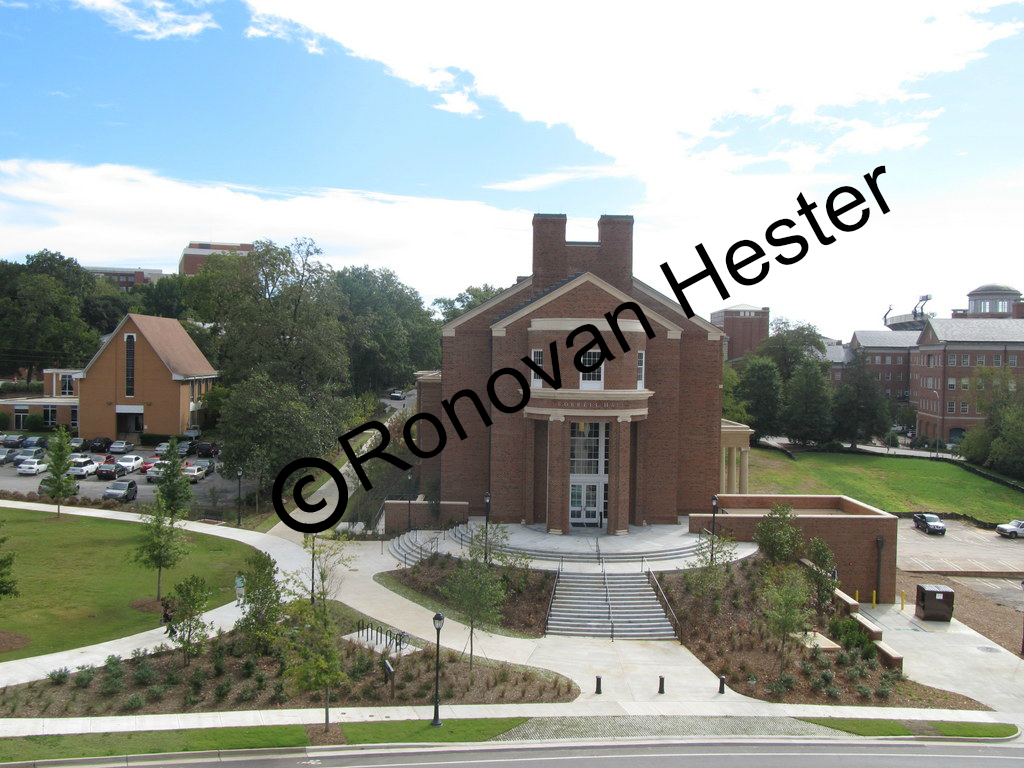
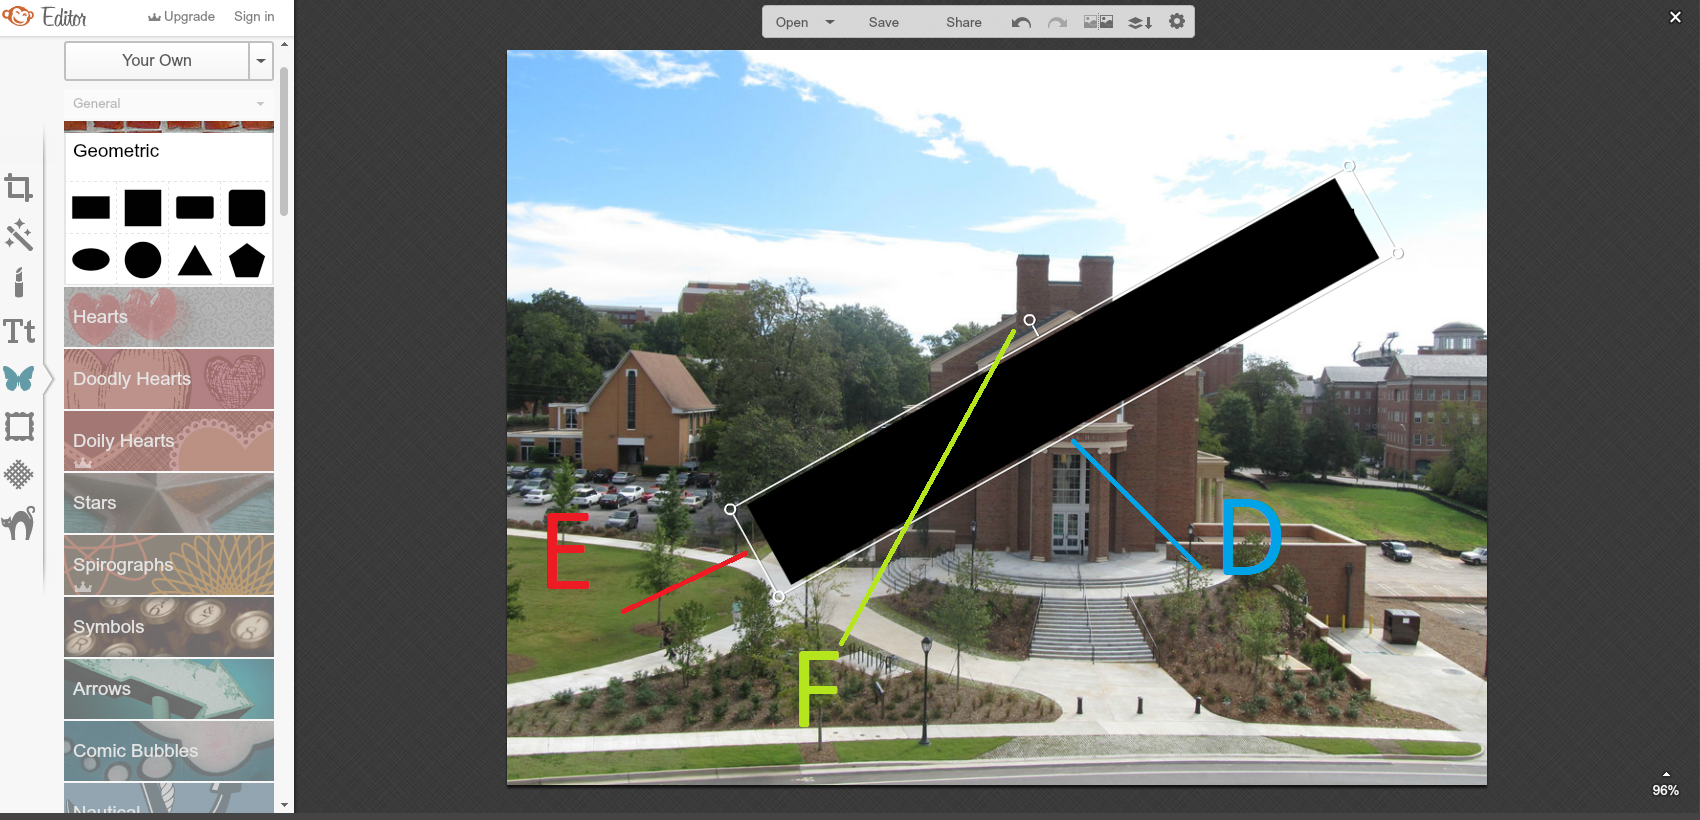
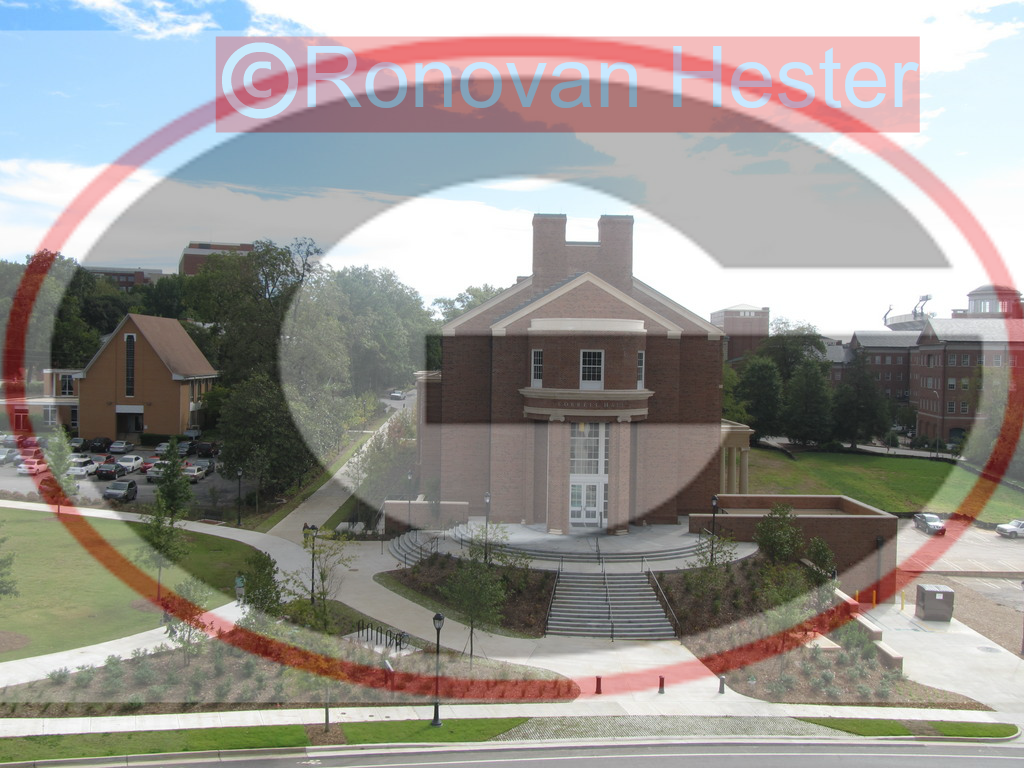
Below is a photo from the top of a parking deck on the campus of UGA. You can see the stadium lights to Sanford Stadium over the buildings in the distance. As you can see, my name doesn’t show very well across the building but very well in the sky.
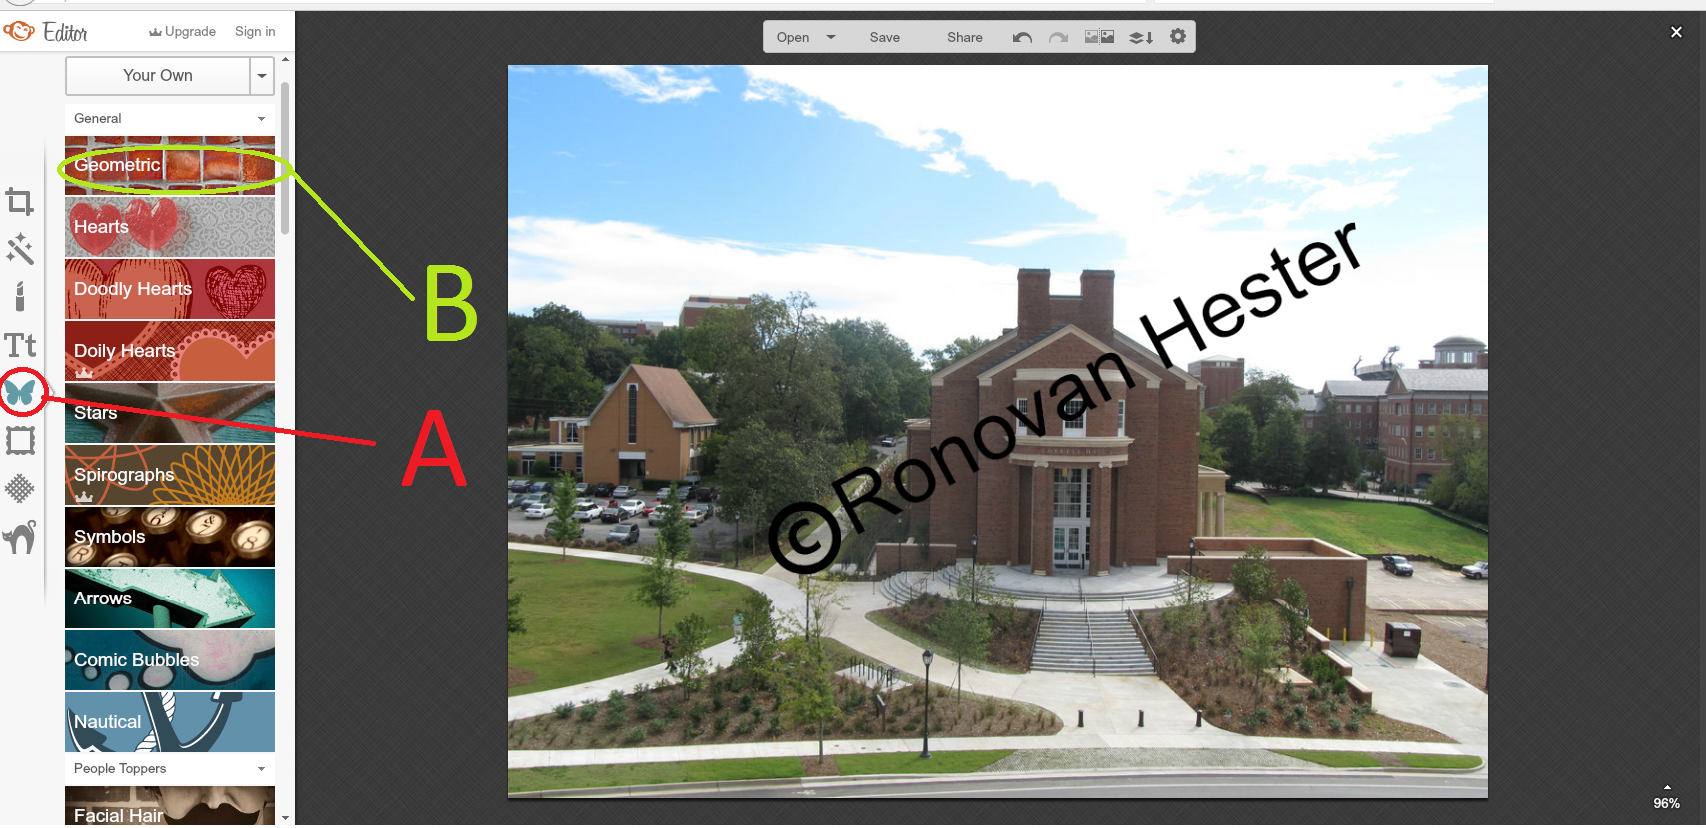
Below you see the menu inside of picmonkey.com after you have loaded your image. The thing to know first is to create the overlay image/shape you want to use and then type your text. You can then manipulate all you like and the text will be to the forefront. Of course you can always do it the other way around as sort of a see through a veil or curtain affect.
A-Points to the Overlay Icon in the shape of a butterfly. The overlay does exactly as it sounds, it overlays something on top of the image already showing. You can even pull in your own image to overlay on top of the image you first loaded.
B- For the purpose of what I want to do with this image and text I’ll chose the Geometric options.
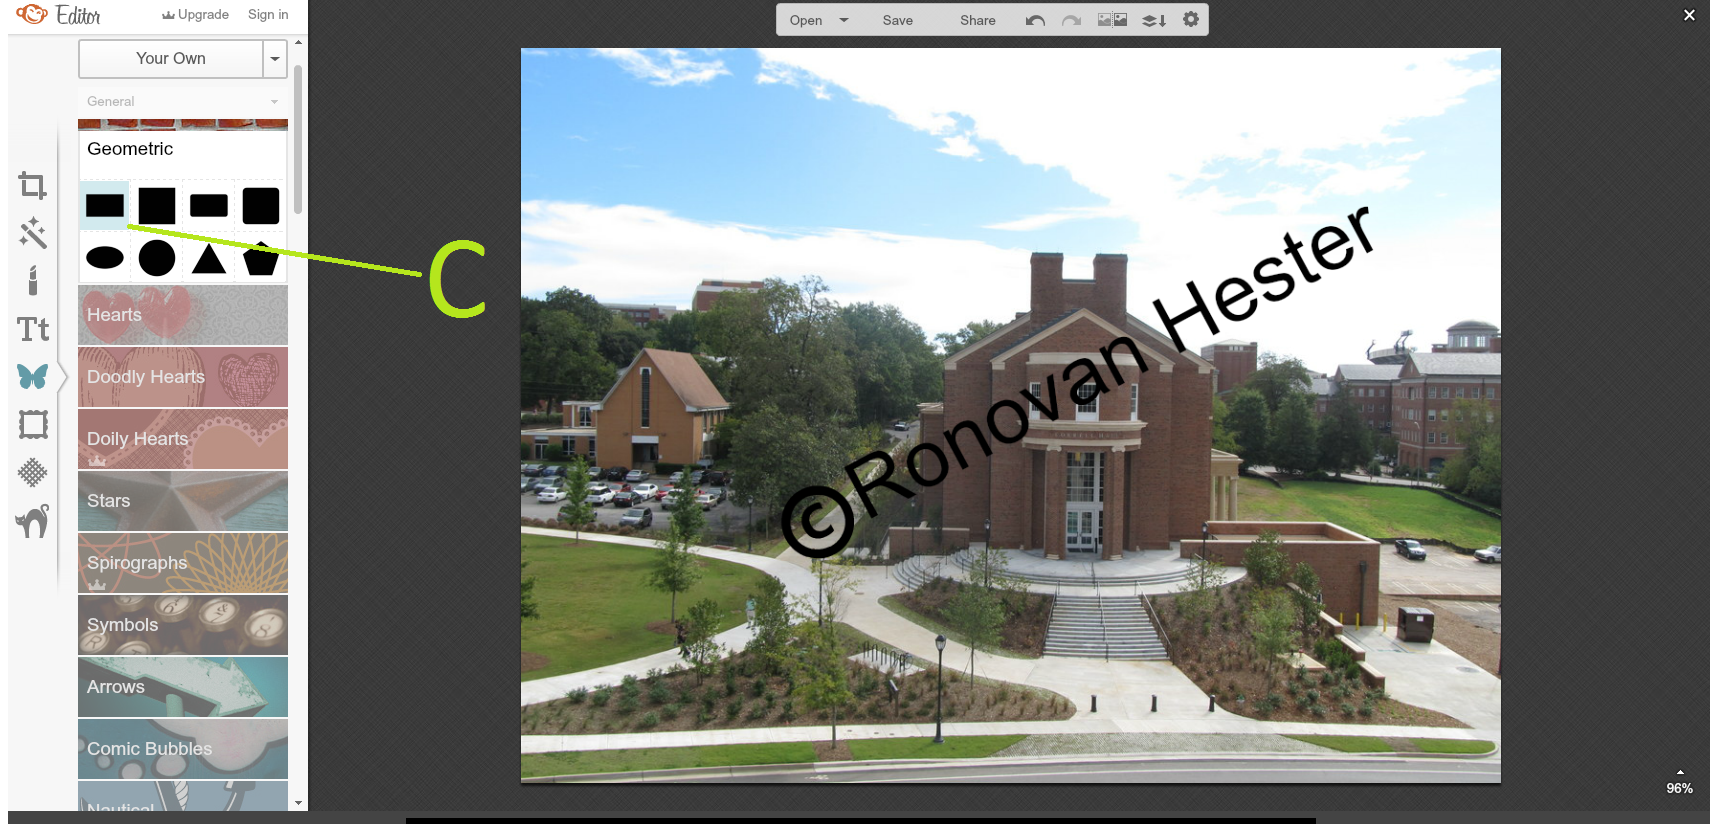
C-I am choosing the rectangular Geometric option because it actually can be manipulated to any height or width. The square, for example, will obviously adjust to remain a square.
D-You are able to make the image height taller or shorter by placing your cursor on the point along the edge and dragging the edge down.
E-You are able to increase or decrease the width by doing the same as the above but along the side edges.
F-By placing your cursor over the small circle over the top of the box and then clicking and holding down your mouse you are then able to rotate or tilt the box however you like. Something to keep in mind is making the text and box lines parallel.
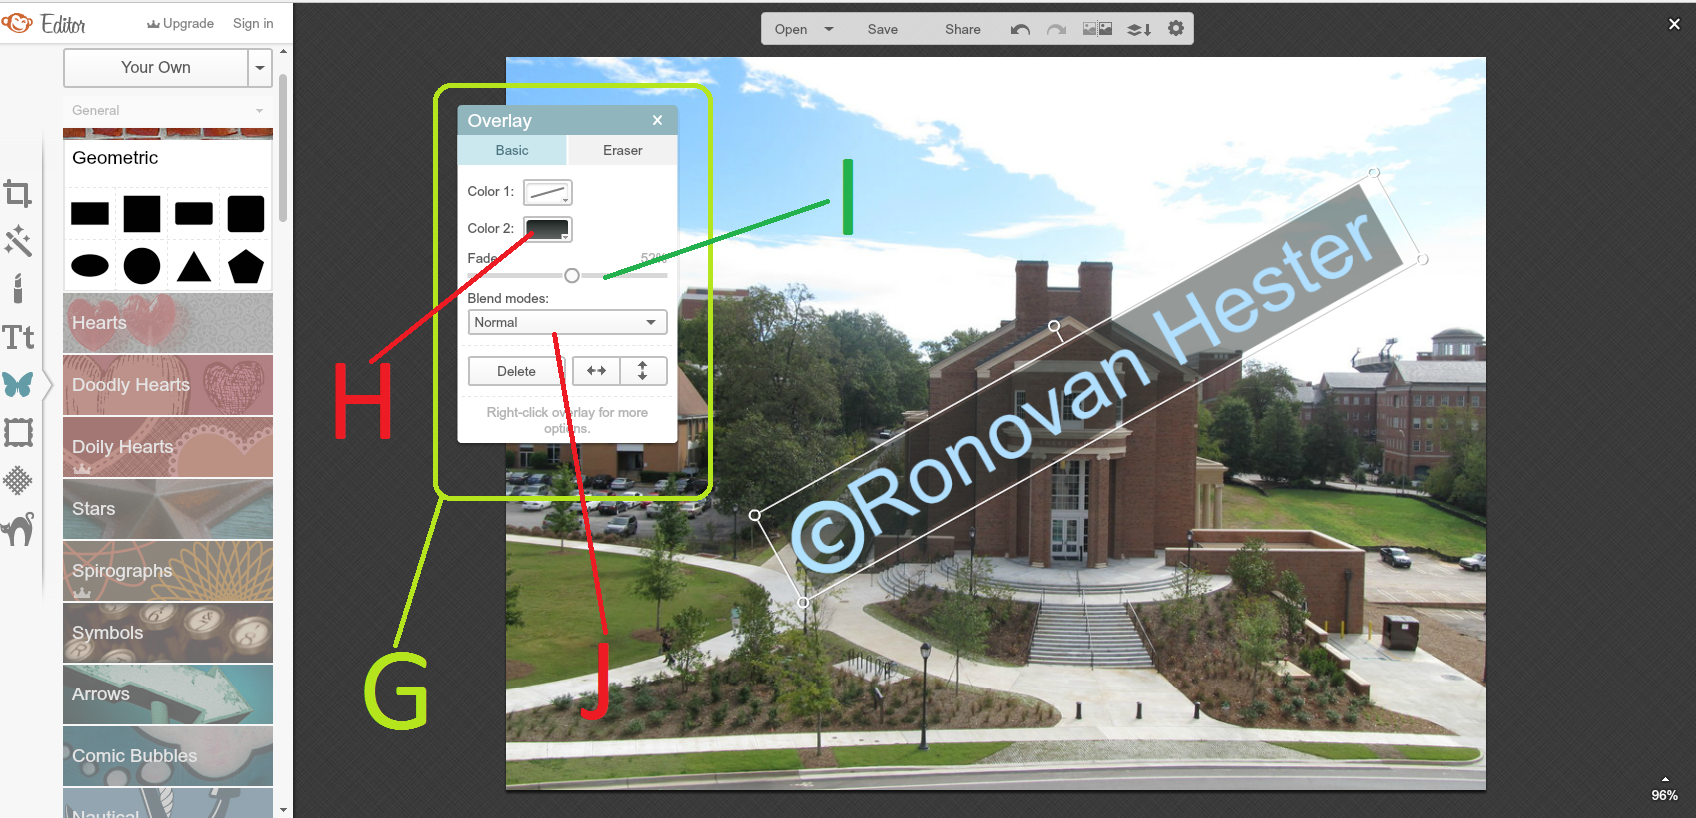
G-Here you see the Editing Box for the Geometric Overlay rectangle I used.
H-There are two boxes, one for the outline of the rectangle, and then below it is the inside of the box, the part we’re concerned with today. The box will start out as black, but you can click on the box signified by “H” here and choose a color. You may first want to use the part signified by the “I” first.
I-To make the box fade to transparent you increase the Fade. I left the color as black here and you can see the letters are still more visible as a whole than before.
J-You are able to do some different Overlay manipulation other than simple fading of a selected color by choosing the Blend Modes option. Simply select the different options within and see what they do. Some are very surprising.
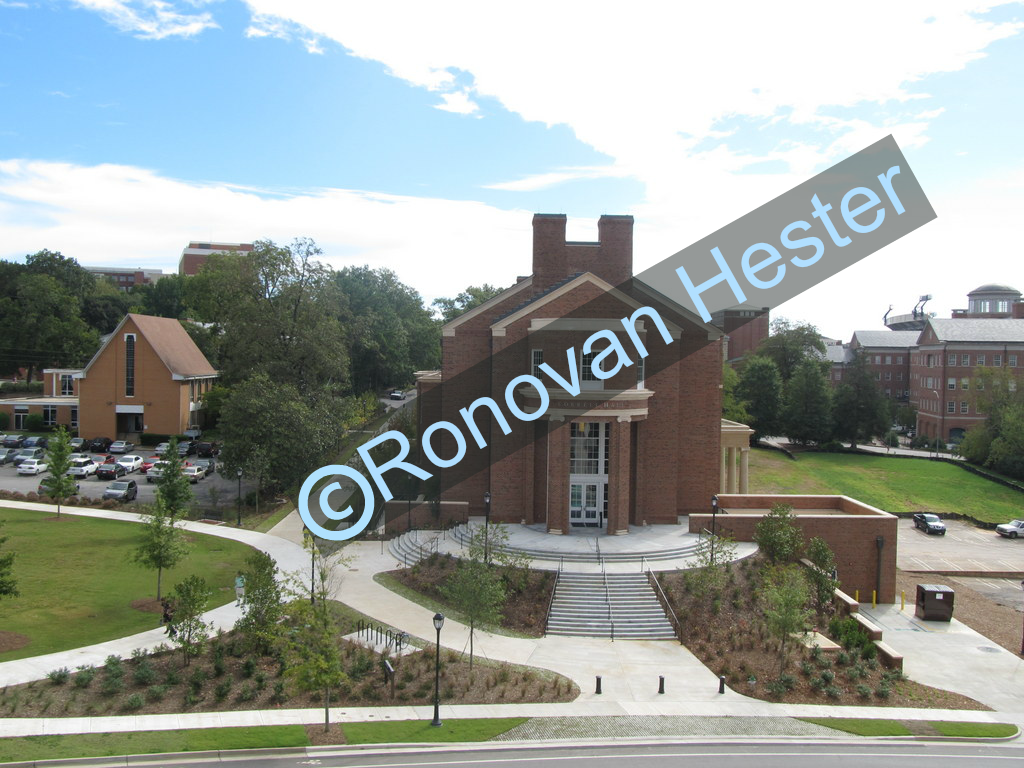
Below you see the final result with the box having been changed to the dark green of the trees in the background to the right of the building. I chose this color by clicking on the black box image, signified by the letter “H” above and choosing the eyedropper. I then clicked on the tree. I could have also let my cursor go over all the colors inside of that letter “H” box and the Faded Geometric rectangle would have changed colors as the cursor passed over each color.
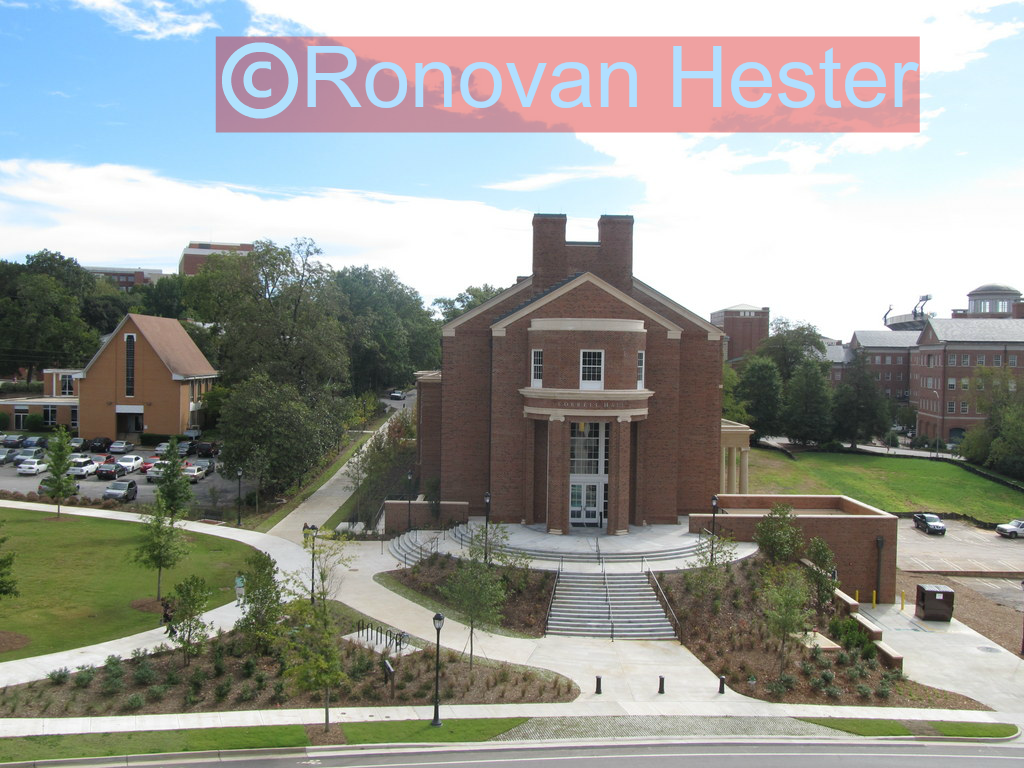
And last we have the copyright in the sky with a red background of a box with the same blue lettering as above. Skies are difficult to have attractive lettering in and this will help you accomplish that. Something to consider with what I did here. I moved the box and text up and then tilted everything back to horizontal. Easy? Maybe for some, but what I did, to make certain the text and the box were in line with each other was drag them both to the bottom and line them up with the bottom edge of the screen. Then I moved them to the top.
You may pull in your own images as overlays by choosing the Your Own at the top of the Overlay options. Following are two examples. One is the UGA G, the image was found in the public domain. The photo is mine. It is followed by the same image with a curtain, found in the public domain, overlay over it.
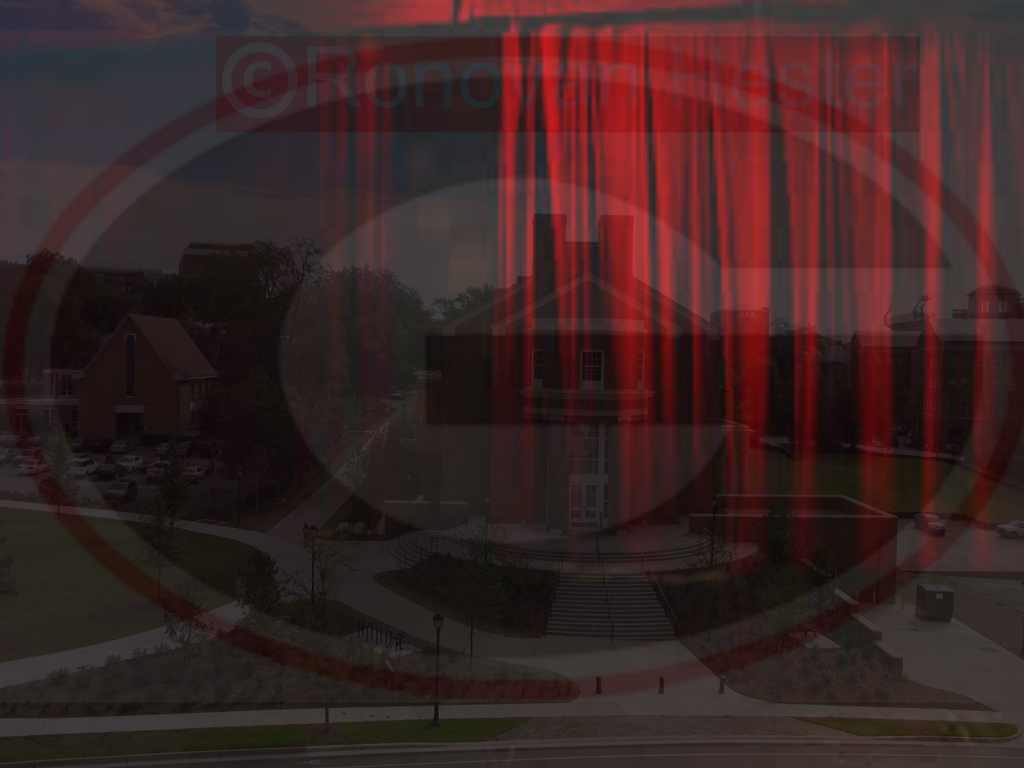
You may have a lot of fun with this feature. I did have to make the G and the Curtain fit the building image. To do that all I had did was take the corner of the image and drag it to increase the size. Try it, you’ll see how easy it is. The other Overlay image options do the same thing as the Geometric and Your Own.
When you save the image, remember to rename it to something other than the original name of the image. That way you keep your original image in its original form.
You are also able to use these techniques when creating book covers.
Enjoy!
Ronovan Hester is an author, with the debut novel Amber Wake: Gabriel Falling due out in December. He shares his life as an amnesiac and Chronic Pain sufferer through his blog RonovanWrites.WordPress.com with the hope if inspiring others to overcome and continue on. His love of poetry, authors and community through his online world has lead to a growing Weekly Haiku Challenge and the creation of a site dedicated to book reviews, interviews and author resources known as LitWorldInterviews.WordPress.com.

Glad to know how to do this… Of course, seeing this knowledge is one thing and applying it will take some practice I am certain. But still, most appreciated!
LikeLiked by 1 person
It’s pretty simple once you actually get in to picmonkey and click the things. Not difficult at all.
LikeLiked by 1 person
Reblogged this on Chris The Story Reading Ape's Blog and commented:
If you have an Image or Photo Editor that can add layers, why not give this a go 😀
LikeLiked by 1 person
So creatively artistic. Thank you..
We had not seen you since moving to self hosted. Nice to see all your work again!
LikeLiked by 1 person
I use a great app called Quote Picture on http://www.symbyoz.com/quotes. It allows you to change the fonts,sizes, colors and preview what it will look like before you save it to your quote wall. It’s free too. 🙂
LikeLiked by 2 people
Sounds very useful. I’ll check it out. Thanks!
LikeLiked by 1 person
Great tutorial! I love picmonkey so much that I subscribe to premium!
LikeLiked by 1 person
I’ve not ventured into the world of Picmonkey yet, but I will now. Thanks for the tutorial, Ronovan.
LikeLike
Fantastic tutorial~ I can’t wait to try it out.
LikeLike
Good information. For cell phones, there are great apps that do the same. Then you just save to device or directly share with WordPress.
LikeLike
Thanks for this information. I hope I can use. You answered a lot of questions I had.
LikeLike
Beautiful! Impressive! I have yet to learn PicMonkey! Just too busy, and Canva is working for me. When I have time…
Janice
LikeLike